Starting a newborn photography business (or refining your studio kit) can feel overwhelming. Explore this practical checklist of essential props for newborn photography that support what professionals value most: smooth posing transitions, consistent styling, and setups that photograph beautifully without adding stress to the session. You’ll also see a clear buying order of newborn photography props list, so you can build a timeless kit step by step.
Because here’s the truth: the strongest newborn galleries don’t come from collecting random props. They come from building a core kit you can rely on — newborn photography props essentials that work together across multiple setups, colour stories, and client requests. Once that foundation is in place, it becomes easy to elevate your studio wardrobe with intentional additions.

Want a printable version of this checklist?
Get the PDF: Essential Props for Newborn Photography (Printable Checklist).
Inside the checklist below, each category links to a curated selection, plus “in action” examples to help you see how these essentials work in real studio sessions.
A quick note on safety: every newborn photographer has their own workflow and training, so this article focuses on prop selection principles — choosing pieces that are stable, easy to clean, comfortable, and designed for newborn posing. Always follow safe handling practices and your own professional guidelines.
Essential Props for Newborn Photography Checklist
(Quick Reference)
Use this as your at-a-glance studio checklist. Each item below links to the section where you’ll find selection tips and examples.
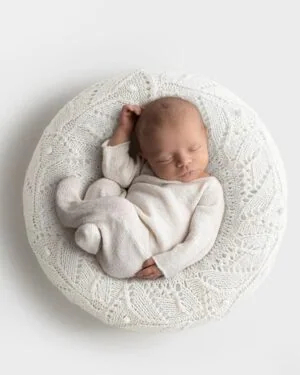
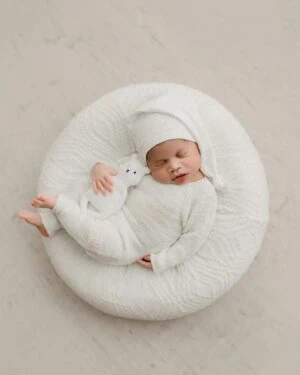
- Posing Base (Your Main Posing Surface)
A stable, supportive base that keeps your setups consistent and makes pose transitions easier. - Posing Pillows (Texture + Support in One)
Adds texture and tone while gently supporting the newborn — a styled surface prop that’s meant to be seen. - Backdrops & Posing Fabrics (Bean Bag Layers + Stand Fabrics)
Stretch, texture, and drape matter — the right fabrics reduce wrinkles and editing time. - Newborn Wraps & Layers
A core wrap collection that works across styles: swaddles, textured layers, and versatile knits. - Hats & Bonnets
The simplest way to add a finishing point without overwhelming a neutral setup. - Tiebacks & Headbands (Finishing Touches for Baby Girls)
Small, refined details for minimal sets — especially when you want the focus on the newborn. - Newborn Outfits (Rompers, Sleepers, Bodysuits)
Designed for photography: easy dressing, comfortable fit, and timeless silhouettes. - Toys & Softies (Teddies, Hearts, and Small Comfort Props)
A gentle way to add story and scale — especially in minimal setups where every detail matters. - Containers & Bowls (Optional Styling Props)
Baskets, bowls, and small beds can add variety, but they work best when supported by your core fabrics and posing base. - Coordinated Sets (The Fastest Way to Build a Cohesive Look)
If time is limited, a curated set can remove decision fatigue and ensure everything styles together.
Save this checklist for later — download the printable PDF: Essential Props for Newborn Photography (Printable Checklist).
Posing Base (Your Main Posing Surface)
A reliable posing base is the foundation of newborn photography essentials. It’s the one piece that affects smooth newborn workflow and everything else: how quickly you can transition between setups, how consistent your angles look, and how calm the session feels when you’re moving through poses.
When photographers talk about props, it’s easy to focus on the finishing details first. But in practice, a well-chosen posing surface is the essential that makes the rest of your kit work harder. It supports the newborn comfortably, keeps your styling stable, and helps you create consistent galleries without constantly re-building the setup.

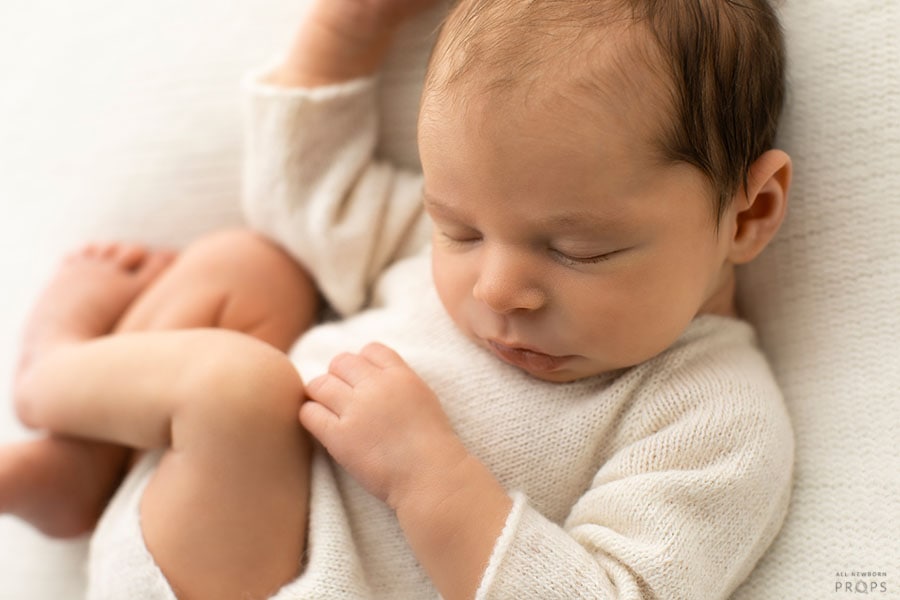
In action: Gabriel long sleeve bodysuit (Cream)
What to look for in a posing base
Choose a posing surface that’s:
- stable and supportive (no sinking or unpredictable shifting)
- easy to keep clean (because real sessions are never perfectly tidy)
- consistent in shape (so your angles and head/hip relationship stay reliable)
- practical for your space (studio storage and on-location setup matter more than people admit)
If you use a traditional bean bag setup, the biggest “hidden cost” is often time: adjusting, smoothing, re-stretching, and re-positioning between images. A posing base should reduce that friction, not add to it.

In action: Molly posing fabric (White) • Kendall knitted romper (Cream)
Workflow note: why this piece affects everything
A posing surface isn’t just where the baby lies. It’s your workflow anchor.
When the base is stable, you can focus on gentle micro-adjustments rather than constantly correcting the entire setup. That’s what keeps sessions moving, helps you preserve a calm environment, and makes it easier to repeat your signature look across clients.

A structured alternative for smaller studios
Many photographers today prefer a more compact posing base that’s easier to store, transport, and keep consistent across setups.
If you’re working in a smaller studio, photographing on location, or simply want a more structured surface, a dedicated newborn poser can be a strong option. The key is choosing one designed to support posing flow and styling flexibility, rather than something that behaves like a decorative pillow.
For a real studio example of this approach, see Structured Posing Base for a Neutral Newborn Studio Session (with a cohesive neutral palette).
If you’d like a deeper look at how to choose a posing base (and how a structured poser system supports variety without clutter), read Newborn poser guide — how to choose a posing base.
If you’re building your kit of newborn photography essentials, a posing base is one of the few pieces that immediately improves session flow. Explore a few studio-ready options below.
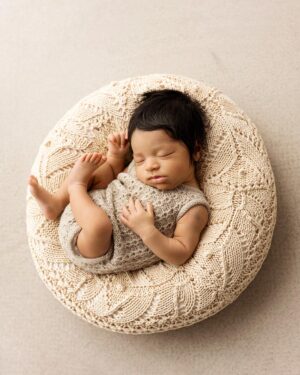

Posing Pillows (Texture + Support in One)
Your posing pillow is one of the few newborn session essentials that can do two jobs at once: it becomes part of the styling and supports the pose. Unlike posing beans or hidden supports used under fabrics, these pillows are designed to be seen — with a beautiful top layer that adds texture, tone, and a refined, premium finish to the setup.
In other words: this isn’t something you tuck away. It’s a surface prop that helps you build a cohesive look while keeping the baby comfortably supported.
What to look for in a posing pillow
A studio-ready posing pillow should be:
- supportive and stable (so the pose holds without constant re-adjusting)
- firm enough to keep its shape (no sagging that changes your angles)
- finished with a surface that photographs beautifully (texture that elevates, not distracts)
- easy to care for (because real sessions aren’t perfectly clean)
Mini posing pillows (small adjustments, big difference)
Smaller pillows are ideal when you want subtle lift and control — refining lines, improving symmetry, and supporting gentle transitions without overcomplicating the setup. They’re often the difference between a pose that looks “almost right” and one that feels polished.
Larger posing pillows (a signature surface)
Larger pillows are your statement foundation. They create an instantly styled base, add visible texture, and help you build variety by swapping tones and materials — all while keeping the session flow practical and repeatable. For photographers who work in a timeless, neutral style, a well-chosen pillow can become one of the most-used pieces in the studio.
For an example of how a neutral, texture-led setup can look in a real session, see Neutral Cream Newborn Photography Session.
A simple “capsule” set to start with
If you’re building your essentials, start with:
- 1 mini pillow for subtle support and quick refinements
- 1 larger pillow in a versatile neutral tone you can use weekly
That combination gives you both control and styling flexibility — without buying pieces that only work once.
If you’re ready to explore options designed specifically for newborn sessions, browse Newborn Posing Pillows for Photography.


Backdrops & Posing Fabrics (Bean Bag Layers + Stand Fabrics)
Backdrops and posing fabrics are where your styling becomes effortless (or time-consuming). They affect wrinkles, texture, drape, colour harmony — and how much time you’ll spend smoothing, adjusting, and fixing creases in post.
A strong backdrop doesn’t just look beautiful. It behaves predictably in real sessions: it stretches when you need it to, lays smoothly when you want it to, and photographs with a refined texture that supports the newborn rather than competing with them.

In action: Xavier newborn photography fabric

In action: Travon textured blanket (Revel Blue)
Stretch vs non-stretch (and why it matters)
If you’re photographing on a bean bag setup, stretch makes a noticeable difference.
A backdrop with stretch helps you create a clean surface with fewer wrinkles, which means:
- less time adjusting during the session
- fewer fixes in editing
- a more consistent, polished look across the gallery
Non-stretch fabrics can absolutely work too — especially when you’re choosing texture on purpose for an organic, editorial feel. The difference is intent. When the fabric choice is deliberate, it looks elevated. When it isn’t, it reads as a setup problem.
A simple rule:
Choose stretch when you want smooth and refined.
Choose texture when you want depth and mood.
Next, let’s talk about texture — and how it affects both the final look and your editing time.
Texture and editing time
Texture is powerful, but it works best with balance.
Heavily textured backdrops can look incredible in minimal palettes, but they also create more visible shadow variation. That can be a feature, not a flaw — as long as you style the rest of the set to match and keep the palette calm.
If you’re building a timeless newborn studio wardrobe, start with a small selection of essential textures you can repeat:
- one smooth/stretch base fabric
- one medium texture (knit, pointelle, subtle stitch)
- one statement texture (sweater knit, heavier weave) for variety
With that trio in place, you can create variety on set without constantly buying “one-off” fabrics.

In action: Luther newborn shorts (Ochre Tan)
Your core fabric capsule (the “always works” set)
If you want fabrics that earn their place in your studio, build a small capsule that mixes across setups and client requests.
Start with 3–5 tones you can reuse constantly:
- one true light neutral (soft white/ivory)
- one warm neutral (cream/oatmeal)
- one mid neutral (sand/latte)
- one cool neutral (light grey)
- optionally one deeper anchor (charcoal/taupe) if it fits your style
This approach keeps your sets cohesive, makes buying decisions easier, and creates the kind of visual consistency that feels premium — both on your website and in client galleries.
If you’re refining your essentials, start with a neutral base fabric you can use weekly — then add one or two textures for variety.


Newborn Wraps & Layers
Wraps and fabric layers are studio essentials because they support both styling and session flow. The right pieces help you work quickly, create cohesive sets, and add texture without pulling attention away from the newborn.
In a practical kit, these pieces do far more than swaddling. They can become your most flexible styling tools across multiple setups — from minimal, monochromatic sessions to softly layered, texture-led galleries.

What makes a wrap or layer studio-ready
The pieces you’ll reach for repeatedly tend to share the same qualities:
- stretch and recovery so fabric holds neatly and photographs cleanly
- a refined feel and finish that looks beautiful close up
- texture that elevates (knit, pointelle, subtle stitch) without looking busy
- tones that mix easily with your backdrops, outfits, and finishing pieces
If you’re refining a timeless kit, prioritise fabrics that behave predictably during a session — pieces that make your workflow smoother, not more fiddly.
Fabric wraps, textured wraps, and smooth wraps (how to choose)
A small mix of wrap types gives you variety without complicating your styling:
Fabric wraps
Ideal when you want an easy swaddle and clean lines. They’re also useful as light layers when you need softness without bulk.
Textured wraps (including sweater knits and pointelle)
Perfect when you want the setup to feel premium and dimensional. Texture adds depth even in a simple neutral palette.
Smooth wraps
Great for minimal sessions and for balancing heavier textures elsewhere (for example, when your backdrop or pillow already has a strong knit pattern).
If you want practical guidance on wrapping styles and how they translate in camera, you can also read Newborn Wrapping Techniques Easy and Admirable.


In action: Steve newborn wrap
Blankets (mini blankets as backdrops, wraps, and layers)
Mini blankets are more versatile than most photographers expect. Even though they’re smaller than a full bean bag backdrop, they’re often enough to cover the working area — especially for tighter framing, overhead angles, or when you’re building a compact setup.
They also work beautifully as:
- a textured layer over a posing base or pillow
- a wrap alternative when you want a softer, more relaxed look
- a styling piece to unify tones across the set
This makes them a smart part of a studio kit: one piece, multiple uses, and a consistently refined finish.
A timeless colour palette strategy
If you want wraps and layers that style easily across client requests, build a capsule around tones that layer well:
- one true light neutral (soft white/ivory)
- one warm neutral (cream/oatmeal)
- one mid neutral (sand/latte)
- one cool neutral (light grey)
- optionally one deeper anchor tone if it fits your style (taupe/charcoal)
For a real example of how neutral wraps and layered textures come together in a session, see Neutral Cream Newborn Photography Session.
If you’re ready to refine this part of your kit, explore wraps and fabric layers.


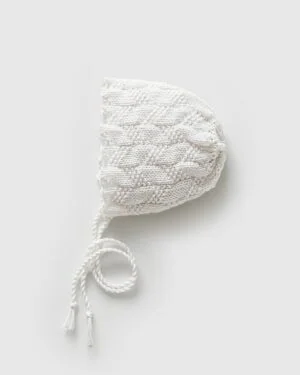
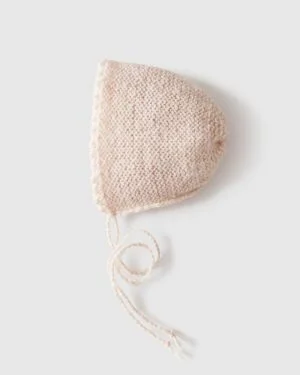
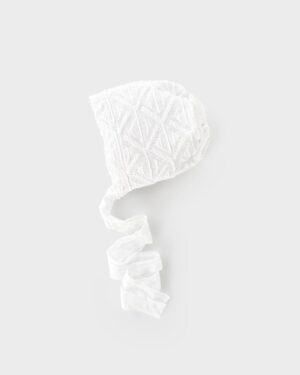
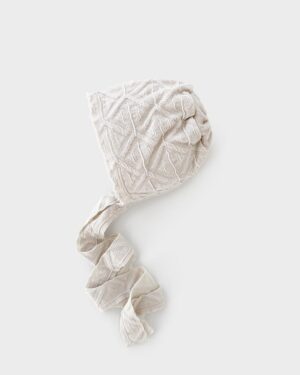
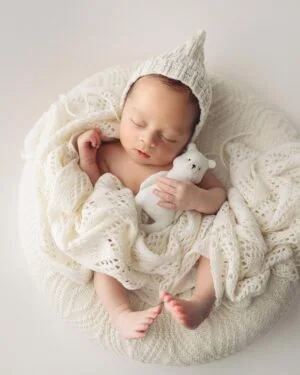
Hats & Bonnets
Hats and bonnets are the finishing pieces that can change the entire feel of a newborn setup without changing the base. In a neutral, timeless style, they’re especially valuable: one small detail can add a focal point, introduce texture, and create a more “complete” look — while keeping the newborn visually central.
The key is restraint. The best hats and bonnets don’t compete with the setup. They quietly elevate it.
When a bonnet works better than a hat
Both can be beautiful, but they create different lines in-camera.
Bonnets tend to feel softer and more classic. They frame the face, photograph well from overhead angles, and often suit delicate, editorial styling — especially when paired with refined textures.
Hats can create a stronger accent. They’re ideal when a setup needs a touch of character or when you want a slightly more playful finish while keeping the palette calm.
If you’re building a versatile kit, it’s worth having both — a few bonnets for that timeless, refined look, and a couple of hats that add personality without becoming a “theme”.

Texture pairing (how to avoid visual clutter)
Hats and bonnets work best when they balance what’s already happening in the set.
A simple styling rule:
- If your backdrop or wrap is heavily textured, choose a simpler bonnet/hat.
- If your base is smooth and minimal, you can introduce a more textured bonnet to add depth.
Keeping the colour story tonal (rather than high-contrast) helps the setup feel premium, even when you’re mixing textures.

In action: Martin bonnet (Cream)
Building a versatile collection
A practical bonnet and hat collection needs to repeat well across sessions.
Start with:
- one light neutral (soft white/ivory)
- one warm neutral (cream/oatmeal)
- one mid neutral (sand/latte or taupe)
- one cool neutral (light grey)
Then add one “signature” texture you love (for example, a delicate knit lace or a refined stitch) that becomes part of your recognisable studio style.

In action: Vincent newborn bonnet

In action: Donna bonnet
Coordinating with wraps and outfits
If you want your sets to look cohesive without overthinking, coordinate hats and bonnets in one of two ways:
- Match the texture family (knit with knit, smooth with smooth), while keeping tones within the same range.
- Contrast texture, not colour (e.g., a textured bonnet paired with a smooth wrap in a similar tone).
This approach keeps the styling intentional and helps you build variety without creating a busy setup.

In action: Sandy lace bonnet

In action: Wesley newborn hat
If you’re ready to explore timeless finishing pieces, browse hats and bonnets for newborn photography.
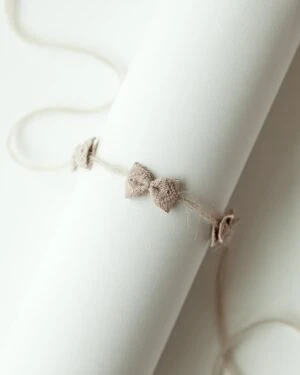
Tiebacks & Headbands (Finishing Touches for Baby Girls)
Tiebacks and headbands are small, but they carry a lot of visual weight — especially in minimal, neutral setups where every detail is noticeable. The right piece adds a gentle focal point and completes the styling without pulling attention away from the newborn.
These are best treated as finishing touches, not “the main prop”. When chosen well, they bring softness, refinement, and a sense of intention to the set.


In action: Coby pearl headband
Minimal vs statement details
In a timeless style, minimal pieces tend to be the most reusable.
Minimal tiebacks
Perfect for clean, modern setups where you want the newborn to stay visually central. Look for delicate silhouettes, small bows, and subtle textures that read as premium close up.
Statement headbands
These work best when the rest of the setup is very calm — smooth wrap, simple backdrop, one texture. A statement piece should feel like an accent, not a theme.
A good rule: the quieter the base, the more freedom you have with the finishing touch.

How to coordinate with wraps, pillows, and outfits
If you want cohesion without spending time “matching”, choose one anchor to coordinate with:
- match the tone (ivory with ivory, cream with cream, light grey with light grey), or
- match the texture family (knit with knit, smooth with smooth), or
- match one small detail in the outfit (a stitch, a tie, a trim)
Avoid mixing too many focal points at once. If the pillow is highly textured or the outfit already has a strong knit pattern, choose a simpler tieback so the set stays balanced.

In action: Hannah chiffon headband

In action: Bethany simple tieback
What photographers reach for most
The most-used headpieces in a studio are usually:
- light neutrals that work across most palettes
- styles that sit gently and photograph cleanly from overhead angles
- pieces that feel refined at close range (stitch quality, tiny details, neat finishing)
If you want to build a small, versatile collection, start with two tonal families:
- one light set (soft white/ivory/cream)
- one warmer or cooler neutral set (oatmeal/tan or light grey)
That gives you options for both baby girls and unisex styling, while keeping everything cohesive.
If you’re ready to choose finishing touches that work across sessions, browse tiebacks & headbands for newborn photography.


Read more: Newborn Girl Photo Ideas: Outfits and Bean Bag Poses >>
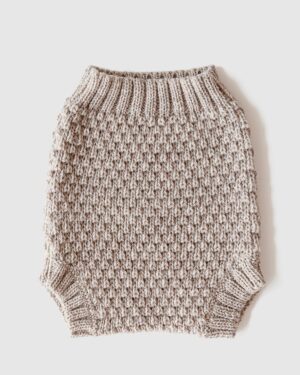
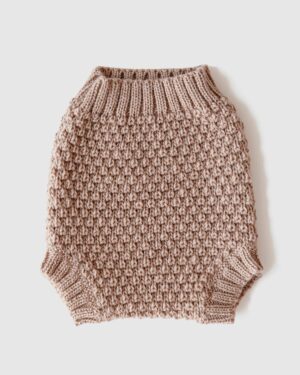
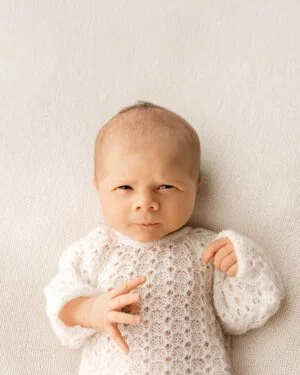
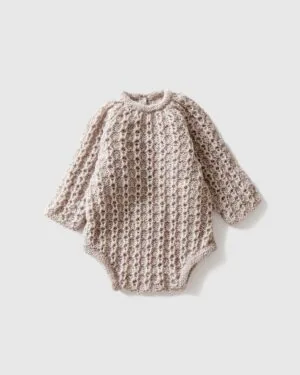
Newborn Outfits (Rompers, Sleepers, Bodysuits)
Outfits are one of the simplest ways to add variety to a newborn gallery without changing your entire setup. A well-chosen romper or sleeper can shift the mood of a session instantly — from minimal and modern to soft and vintage — while keeping the styling cohesive and the newborn visually central.
For photographers working in a timeless, neutral style, outfits are especially powerful because they add interest through texture and silhouette, not through loud colour or themed details. The goal is a refined layer that complements your wraps, pillows, and backdrops rather than competing with them.
What makes an outfit “made for newborn photography”
Not every baby outfit works well in a newborn session. The pieces that earn their place in a professional kit usually have:
- an easy-on, easy-off design (so dressing doesn’t disrupt the flow)
- a fit that looks intentional in camera (no bunching, no awkward bulk)
- soft, comfortable materials that photograph beautifully up close
- timeless shapes that work across different styling directions
When an outfit is designed with posing in mind, it supports smoother transitions — and keeps attention on the newborn, not on constant wardrobe adjustments.

In action: Jason footless sleepsuit • Zephyr simple bow headband
Building variety without changing your whole kit
Outfits create variety best when they sit inside your existing palette.
Instead of changing everything at once, keep your base consistent (posing surface + backdrop tone), then swap:
- silhouette (sleeper vs romper vs bodysuit)
- texture (smooth knit vs pointelle vs heavier stitch)
- coverage (bare legs vs long sleeve)
This approach gives you “new” galleries with minimal extra styling work — and keeps your studio kit cohesive.
One outfit, multiple setups
A versatile outfit should work across more than one styling direction. The most practical pieces look equally at home:
- on a posing pillow in a minimal setup
- layered with a wrap for softness
- paired with a bonnet or tieback as a subtle finishing point
If you’d like more ideas on styling outfits to create variety without overcomplicating your workflow, read Newborn Photo Outfits: How to Add Variety to Your Gallery Easily.
If you’re ready to browse studio-ready pieces, explore newborn photo outfits.
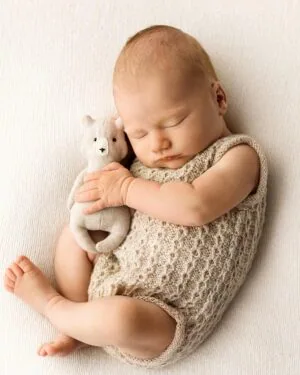
Toys & Softies (Teddies, Hearts, and Small Comfort Props)
Toys and softies are the smallest props in your kit, but they can add a surprising amount of story — especially in minimal, neutral setups where every detail is intentional. A tiny teddy, a soft heart, or a simple comfort piece can bring warmth and scale without turning the session into a theme.
The key is choosing softies that feel timeless and understated. Think of them as gentle accents that support the mood of the image, not the main event.
When softies elevate a minimal setup
Softies work beautifully when the base is calm:
- a smooth or lightly textured backdrop
- a neutral wrap or outfit
- one clear focal point (the newborn)
In these setups, a small softie adds just enough character to make the image feel complete — without pulling attention away from the baby.
Scale, placement, and storytelling
Because softies are visually “read” quickly, placement matters.
A simple approach:
- keep the softie close to the newborn (so it feels connected, not staged)
- place it where it supports the composition (near the hands, feet, or along the body line)
- avoid cluttering the image with multiple accents at once
Softies also help with scale in wider compositions. A small, neutral teddy or heart can balance negative space and make the setup feel more intentional.
Choosing timeless designs (not trendy themes)
For a premium, repeatable studio kit, look for pieces that:
- stay within your tonal palette (ivory, cream, oatmeal, grey, soft browns)
- have clean shapes and refined finishing
- photograph well close up (texture is beautiful, but not busy)
- aren’t tied to a seasonal trend or novelty theme
The most useful softies are the ones you can use across multiple sessions and styling directions — they quietly belong.
If you’d like to build a small, versatile selection, start with:
- one neutral teddy (a classic, understated silhouette)
- one simple heart or small comfort accent in a matching tone
If you’re ready to add these finishing touches to your essentials, browse toys & softies for newborn photography.


Containers & Bowls (Optional Styling Props)
Containers — bowls, baskets, small beds, and other vessels — can add variety to a newborn gallery, but they work best as a secondary layer. They’re not essential in the same way wraps or backdrops are. Instead, they’re a styling choice that can shift the mood of a setup and introduce a more sculptural silhouette.
If you use containers, the goal is always the same: the newborn stays central, the styling stays calm, and the prop supports the composition rather than becoming the subject.

In action: Create-a-Nest™ poser Stars
Size, proportion, and stability (the non-negotiables)
A container needs to be proportionate to the newborn and stable within the setup. If the scale is off, the image can look unbalanced. If the container isn’t stable, it interrupts the workflow and adds unnecessary risk.
A few practical checks photographers tend to rely on:
- the container should feel sturdy and predictable on the surface you’re working on
- the size should suit newborn proportions without looking oversized or cramped
- the shape should support a clean composition (especially from overhead angles)
(Safety note: always follow your own professional handling practices and training when posing a newborn.)
A refined trend: “hidden bowl” shaping under fabric
One elegant approach is using a bowl beneath a fabric backdrop so the container isn’t the focal point — instead, it subtly shapes the setup through gentle shadows. This can create a refined, editorial look while keeping the overall styling minimal.
If you’re working in a timeless palette, this technique is often more versatile than highly themed containers, because it stays understated and repeatable.
Choosing containers that feel timeless (not themed)
If you’re building a premium kit, look for containers that feel sculptural and neutral rather than novelty. Pieces with clean lines, thoughtful texture, and a calm tone tend to photograph beautifully across different client requests and colour stories.
In the past, we created our own handcrafted posing bowls — Vessels — designed to be unique, tactile, and camera-friendly. Even when a specific piece isn’t available, the selection principles stay the same: choose timeless shapes that support the newborn and suit your signature style.
If you’d like inspiration and practical guidance on choosing containers that elevate your work, read Newborn Photography Baskets: Unique Props for Jaw-Dropping Pictures.
Coordinated Sets (The Fastest Way to Build a Cohesive Look)
Coordinated sets are the shortcut to a polished, premium gallery — especially when you want everything to work together without spending extra time planning each setup. Instead of searching for matching pieces one by one, a curated set gives you a ready-made colour story: texture, tone, and proportions already considered.
For busy studios, sets aren’t just about convenience. They support consistency. When your wraps, layers, finishing touches, and styling props already coordinate, it becomes much easier to repeat your signature look across clients — even when you’re working through back-to-back sessions.
Who sets are best for
Coordinated sets are a strong choice if you:
- want a cohesive look without overthinking the styling
- prefer working within a consistent palette (neutrals, tonal stories, soft colour)
- photograph both baby girls and baby boys and need versatile combinations
- want to refine your studio wardrobe with pieces that naturally mix and match
They’re also helpful when you’re building your kit from scratch, because you can start with one set and expand around it later.
What a good coordinated set includes
A well-designed set usually brings together a few key layers, for example:
- a core wrap (for swaddling and calm, clean starts)
- a textured layer or fabric (to add depth and shape)
- one finishing piece (bonnet, hat, tieback, or softie)
- optional styling support (pillow/poser cover, depending on the set)
The strongest sets don’t rely on loud colour or novelty. They rely on thoughtful texture and tonal harmony — which is exactly what keeps them timeless.
A simple buying order (so your kit builds itself)
If you want sets that genuinely earn their place in your studio, build in a sequence:
- Start with one versatile neutral set you can use weekly.
- Add a second set that introduces a new texture or slightly different tone (e.g., warmer vs cooler neutrals).
- Expand with one “signature” set that matches the mood you’re known for.
This keeps your purchases intentional and makes it easy to create variety without rebuilding your entire collection each time.
If you’d like to browse curated combinations designed to style together effortlessly, explore our coordinated newborn photography prop sets.


Putting It All Together
If there’s one takeaway from this essential props for newborn photography checklist, it’s that a strong kit is built around a few reliable essentials — pieces that support a smooth workflow and style beautifully across different sessions.
Start with the foundation: a posing surface you trust, supportive pillows that add texture, and fabrics that behave predictably in camera. From there, wraps, outfits, and finishing touches become easy to mix and repeat — creating variety without losing that calm, premium look.
If you’re unsure where to begin, choose one category to upgrade first (the one that slows you down most during sessions) and build from there. Small, intentional improvements compound quickly in a studio: better flow, more consistent galleries, and fewer “last-minute” styling decisions.
Want to keep this checklist in your studio? Get the printable PDF by email.
And if you’d like a simple visual summary you can save for later, the infographic below recaps the essentials at a glance.

Prefer a quick walkthrough? Watch the short video version of this checklist below.
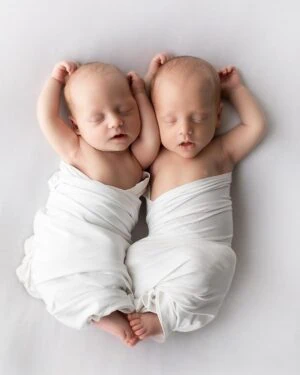
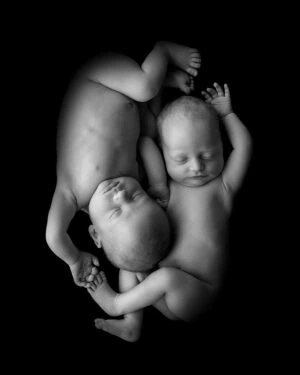
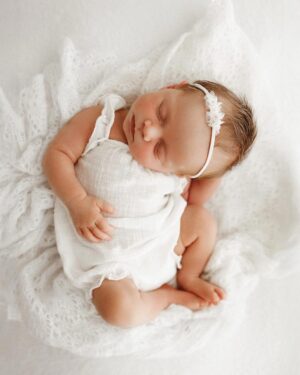
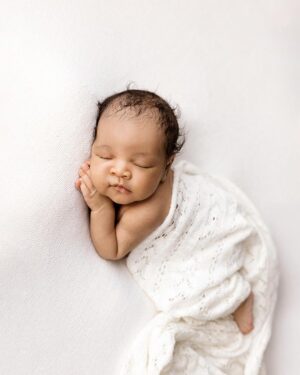
Image credits (in order of appearance):
- Kristina Mack from Tiny Posers.
- Simone C Photography.
- Mai Kadohira from Kotori Photography.
- Cheryl Wiltshire from Ten Tiny Toes Newborn Photography.
Save this checklist of essential props for newborn photography for later on Pinterest — here’s a ready-to-pin graphic.


Hey! Can I get that free ebook? Cant figure out how to download. Thanks!
Hi Esty,
please subscribe via the link >> https://allnewbornprops.com/sdgjvrtm/